
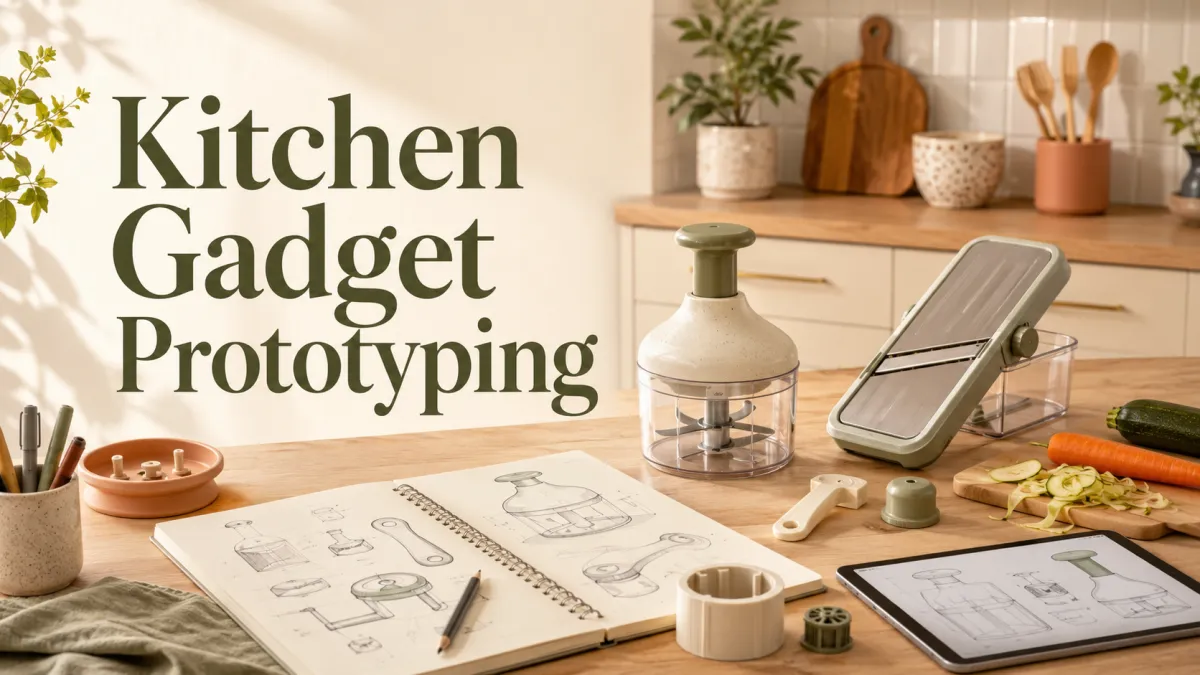
The Complete Guide to Kitchen Gadget Prototyping
Kitchen gadgets — the small tools, utensils, and specialized helpers that inventors dream up to solve everyday cooking problems — are one of the most active categories in consumer product development. They also carry a specific set of prototyping requirements that generic product development advice doesn’t fully address. Between food-contact considerations, ergonomics for wet hands, cleanability under real kitchen conditions, and the reality that a kitchen gadget has to earn its counter space against alternatives, prototyping a kitchen gadget successfully requires more discipline than the small size of the product might suggest. This guide walks through the full prototyping journey for inventors, entrepreneurs, and small business owners bringing a kitchen gadget to market.
Quick Answer
Kitchen gadget prototyping involves five main areas of work: understanding the specific cooking problem the gadget solves and the target user; choosing the right prototype method for the design (CNC machining for early geometry validation, soft tooling for pre-production validation in production-representative materials, injection molding samples for final validation); selecting materials appropriate to kitchen conditions (heat resistance, food-contact appropriateness, dishwasher tolerance, cleanability); testing prototypes under real kitchen conditions with actual users; and preparing the outputs manufacturers need for production. A full-service product development firm coordinates these areas across a structured Phase 2 that produces manufacturer-ready designs.
Key Facts
- Kitchen gadgets have specific design requirements around food contact, heat, moisture, and cleanability that generic product design doesn’t fully address
- The most successful kitchen gadgets solve a specific cooking problem that existing tools don’t solve well
- Prototyping methods for kitchen gadgets include CNC machining, soft tooling, and injection molding samples — chosen based on validation stage
- Material selection has to account for food-contact appropriateness, dishwasher tolerance, heat resistance, and cleanability
- Kitchen gadgets fit primarily in the consumer products vertical, with hardware and soft goods components as needed
Key Takeaways
- The first step in kitchen gadget prototyping is defining what specific problem the gadget solves and who it solves it for
- Prototype method selection should match validation stage: CNC machining for early geometry, soft tooling for pre-production, injection molding samples for final
- Materials for kitchen gadgets need heat resistance, food-contact appropriateness, dishwasher tolerance where applicable, and cleanability under real kitchen conditions
- Testing kitchen gadgets in real kitchens with real users reveals findings lab testing cannot produce
- Regulatory certification for food-contact materials is done by qualified testing labs; the design decisions supporting it are Phase 2 work
- Preparing manufacturer-ready outputs during Phase 2 is what makes Phase 3 manufacturer engagement productive
Table of Contents
- What Kitchen Gadget Prototyping Involves
- Understanding Kitchen Gadget Design Requirements
- Choosing the Right Prototype Method
- Materials for Kitchen Gadget Prototypes
- Testing Kitchen Gadget Prototypes
- Preparing Outputs for Manufacturing
- How the Four-Phase Process Applies to Kitchen Gadgets
- How Rabbit Product Design Supports Kitchen Gadget Development
What Kitchen Gadget Prototyping Involves
Kitchen gadget prototyping is the structured process of taking a kitchen tool idea from initial concept to a design ready for manufacturer engagement. It combines industrial design (form, ergonomics, aesthetic), mechanical design (structure, function, mechanism), material selection (heat, moisture, food-contact appropriateness), and testing (function under real kitchen conditions, user acceptance) into an integrated Phase 2 workflow.
The size of a kitchen gadget can make prototype work seem simpler than it actually is. A small utensil looks like a small design problem, but the specific stresses kitchen use produces — heat cycling, dishwasher exposure, food contact chemistry, wet-handed operation, cleanability — add complexity that’s not proportional to the product’s dimensions. Kitchen gadgets are small products with real product development requirements.
This guide walks through the areas that make kitchen gadget prototyping work: understanding requirements, choosing methods, selecting materials, testing appropriately, and preparing outputs. Each area has category-specific considerations that inventor projects benefit from addressing deliberately.
Understanding Kitchen Gadget Design Requirements
The first step in prototyping a kitchen gadget is understanding what the design has to accomplish and the conditions it will face. Getting the requirements right shapes every subsequent decision.
The Specific Cooking Problem
Successful kitchen gadgets solve a specific problem that existing tools don’t solve well. Understanding the specific problem — who has it, how often, how the current solution falls short, and what a better solution would look like — is Phase 1 research work that shapes every subsequent Phase 2 decision. Gadgets without a clear problem-user match typically struggle in the market regardless of design quality.
The Target User
Understanding the target user includes cooking skill level, kitchen equipment already owned, physical characteristics (hand size, strength, dexterity), and the specific contexts where the gadget will be used. Products designed for professional chefs face different requirements than products designed for casual home cooks; products for accessibility support have different requirements than products for enthusiast use.
The Use Conditions
Kitchen gadgets face specific use conditions: contact with hot surfaces or hot food, contact with acidic or fatty foods, contact with water and detergents, storage in drawers or on counters, handling by wet or greasy hands. Understanding which conditions the specific gadget will face determines material selection and design details.
Choosing the Right Prototype Method
Prototype method selection for kitchen gadgets should match the specific validation question each stage needs to answer. Different methods answer different questions.
CNC Machining for Early Geometry Validation
CNC machining produces prototype parts from solid material using computer-controlled cutting. For kitchen gadgets, CNC machined parts fit early-stage validation of geometry, fit, and basic mechanical function. Users can hold and evaluate machined prototypes for ergonomic feel, size, and grip. Structural components can be tested for basic mechanical function, though the material properties may differ from production molded parts.
Soft Tooling for Pre-Production Validation
Soft tooling uses aluminum or lower-hardness steel molds to produce injection-molded parts in production-representative materials at lower investment than production tooling. For kitchen gadgets, soft tooling parts let the team validate material behavior under kitchen conditions — heat resistance, dishwasher tolerance, food chemistry exposure — in the actual production material before committing to hardened tooling.
Injection Molding Samples for Final Validation
Injection molding samples from production tooling are the final validation step for kitchen gadget parts before committing to full production. These parts represent what production parts will look like. First-article inspection validates that production produces parts to specification.
Materials for Kitchen Gadget Prototypes
Material selection for kitchen gadgets has to match the specific conditions the product will face. Getting material selection right during Phase 2 design prevents field failures that would surface during use.
Heat-Resistant Plastics
Kitchen gadgets often need heat resistance appropriate to their use — whether that’s contact with hot food, proximity to cooking surfaces, or dishwasher exposure. Common engineering plastics have specific temperature ratings that determine whether they can handle the intended use. Materials selected for cost or appearance without checking temperature ratings often produce products that deform, discolor, or degrade under actual use.
Food-Contact Materials
Materials that contact food need appropriateness for food contact. This isn’t just a regulatory matter — material selection affects whether the product is safe for its intended use. The specific material grades, additives, and finishes acceptable for food contact are more limited than general-purpose material options. Working with material selection that supports food contact from the start is more efficient than trying to substitute food-safe materials late in development.
Corrosion-Resistant Metals
For kitchen gadgets with metal components, corrosion resistance matters because water, acidic foods, and detergents all promote corrosion in vulnerable metals. Stainless steel grades appropriate to food contact are common choices. Coated or treated metals may work for some applications where the coating remains intact.
Elastomers and Soft Components
Grips, seals, and soft components need heat resistance, food-safe formulation where applicable, and durability under repeated use and washing. Standard elastomers may degrade under repeated dishwasher exposure or high temperatures. Kitchen-appropriate elastomers cost more but survive the use conditions kitchen products face.
Testing Kitchen Gadget Prototypes
Kitchen gadget prototype testing has to include real kitchen use conditions — not just controlled lab validation. Products validated only in controlled conditions typically reveal problems immediately when actual users cook with them.
Functional Testing Under Representative Conditions
Functional testing validates that the gadget performs its intended task under representative conditions. A peeler should peel effectively; a whisk should whip effectively; a chopper should chop effectively. Functional testing during Phase 2 catches design problems that would otherwise reach users.
Ergonomic Testing With Wet and Greasy Hands
Kitchen use involves wet, greasy, and full hands. Ergonomic testing that only evaluates gadgets under dry-handed conditions misses ergonomic problems that surface immediately in real cooking. Testing with representative hand conditions during Phase 2 reveals grip and control problems that would otherwise become user complaints.
Durability Testing Under Real Use Cycles
Kitchen gadgets face repeated use cycles — daily use for years in some cases. Durability testing should include representative use cycles, dishwasher cycles where applicable, thermal cycling, and impact testing against typical kitchen surfaces. Testing at production-representative cycle counts catches problems that would surface after months of user experience.
User Testing in Real Kitchens
Real kitchen testing places prototypes with actual users in their own kitchens doing their own cooking. This reveals how users actually interact with the gadget — storage locations, cleaning approaches, use patterns, integration with existing kitchen workflows. Real kitchen testing during Phase 2 is where kitchen gadget designs get validated against how users actually cook.
Preparing Outputs for Manufacturing
Phase 2 prototype work should produce specific outputs that manufacturer engagement in Phase 3 depends on. Preparing these outputs deliberately during Phase 2 makes the transition to production much smoother.
Validated Design
The design has been tested through prototype iterations and validated for function, ergonomics, and material behavior. Manufacturers evaluating a validated design know they’re producing what has been proven, not figuring out design problems along the way.
Complete Bill of Materials
Every component, material, hardware item, and packaging element is listed with specifications, quantities, and suppliers where relevant. Complete BOMs enable accurate manufacturer quoting.
Tech Pack and DFM-Ready Files
The tech pack documents critical dimensions, tolerances, surface finishes, and quality criteria. CAD files reflect DFM review appropriate to the intended manufacturing method — injection molding for most kitchen gadget applications. Manufacturer engagement without these outputs typically produces vague quotes and manufacturing surprises.
How the Four-Phase Process Applies to Kitchen Gadgets
The four-phase product development process organizes kitchen gadget work across a structured sequence.
Phase 1 (Research & Ideation)
Phase 1 establishes the target cooking problem, target user, competitive landscape, and unit economics. Patent research at Phase 1 identifies IP considerations. For kitchen gadgets, Phase 1 research should include understanding actual cooking behaviors, kitchen conditions the gadget will face, and any regulatory considerations for food-contact materials.
Phase 2 (Design & Prototype)
Phase 2 executes industrial design, mechanical design, and prototyping with the kitchen context established in Phase 1. Material selection reflects kitchen requirements. Prototyping through CNC machining, soft tooling, and injection molding samples matches method to validation stage. Testing includes functional testing, ergonomic testing, durability testing, and real kitchen testing.
Phase 3 (Sourcing & Manufacturing)
Phase 3 qualifies suppliers capable of producing kitchen-appropriate materials and finishes. Supplier qualification verifies capability with the specific materials kitchen gadgets require. First-article inspection validates production parts against the validated design.
Phase 4 (Branding & Marketing)
Phase 4 launches the gadget through channels appropriate to kitchen gadget buyers — kitchen retailers, cooking-focused publications, direct-to-consumer channels. Packaging communicates kitchen-relevant features clearly (dishwasher-safe, heat range, food-safe materials).
How Rabbit Product Design Supports Kitchen Gadget Development
Kitchen gadget development requires coordinating industrial design, mechanical engineering, material selection for food-contact and thermal conditions, and testing under real kitchen use — a multi-discipline challenge that first-time inventors often don’t have the experience to manage across separate vendors. Rabbit Product Design handles this integration under one roof. With 9 years in business, over 2,000 products developed, and senior engineers averaging 27 years of experience, the firm brings the coordination discipline that kitchen gadget prototypes require.
Kitchen gadgets fit primarily in the consumer products vertical, one of the firm’s five verticals — consumer products, soft goods (bags, cases, wearables, sports gear, pet products), hardware (brackets, hinges, latches, mounting systems, mechanical assemblies, fixtures, storage hardware), electronic products and IoT, and inventor projects. Kitchen gadgets may also involve hardware components (mounting systems, structural elements) or, for connected kitchen gadgets, electronic components. Vertical-specific experience shapes appropriate approaches for each category.
The Phase 2 discipline Rabbit Product Design brings to kitchen gadget prototypes includes material selection matched to kitchen conditions (heat, water, food contact, dishwasher cycles); prototyping through CNC machining, soft tooling, and injection molding samples appropriate to validation stage; structured testing including thermal cycling, dishwasher validation, ergonomic testing under real hand conditions, and user testing in real kitchens; and DFM review integrated throughout Phase 2 to prevent Phase 3 rework.
For inventors developing kitchen gadgets, understanding the specific kitchen use conditions is Phase 1 work that shapes every subsequent decision. Senior engineers with kitchen product experience know which materials survive dishwasher cycles, how to structure real kitchen testing to produce actionable feedback, and how to sequence prototype validation so cooking-condition testing happens while design changes are still economical. Food-safe material certification and any required regulatory testing is done by qualified testing labs; the design decisions that make those certifications achievable are Phase 2 work.
Kitchen Gadget Development Services Across Phases
- Phase 1: research on target cooking problem, target user, competitive landscape, unit economics, regulatory awareness for food-contact products
- Phase 2: industrial design and mechanical design with kitchen-appropriate material selection; prototyping through CNC machining, soft tooling, and injection molding samples; functional, ergonomic, durability, and real kitchen testing
- Phase 3: supplier qualification for kitchen-appropriate materials and finishes, first-article inspection, production coordination
- Phase 4: packaging communicating kitchen-relevant features clearly, marketing suited to kitchen gadget channels and audiences
To begin a product development engagement for a kitchen gadget, contact Rabbit Product Design.
Conclusion
Kitchen gadget prototyping combines industrial design, mechanical engineering, material selection for kitchen conditions, and testing under real cooking use into an integrated Phase 2 workflow. Success starts with understanding the specific cooking problem the gadget solves and the target user; continues through choosing the right prototype method at each validation stage; requires material selection appropriate to heat, moisture, food contact, and cleanability; depends on testing under real kitchen conditions with actual users; and produces the outputs manufacturer engagement in Phase 3 needs. For inventors, entrepreneurs, and small business owners developing kitchen gadgets, disciplined Phase 2 work is what separates gadgets that build repeat purchases from gadgets that get returned after the first dishwasher cycle.
FAQ
What does kitchen gadget prototyping involve?
Kitchen gadget prototyping involves understanding the specific cooking problem the gadget solves, designing industrial and mechanical elements appropriate to kitchen use, selecting materials that handle heat, food contact, moisture, and cleaning, prototyping through CNC machining and soft tooling as the design converges, testing under real kitchen conditions with actual users, and preparing manufacturer-ready outputs for production. Each area has kitchen-specific considerations that generic product development doesn’t fully address.
What materials work best for kitchen gadget prototypes?
Materials that combine appropriate mechanical properties with heat resistance, food-contact appropriateness, dishwasher tolerance where applicable, and cleanability. Common examples include heat-resistant engineering plastics for utensils and gadget bodies, stainless steel for cutting or contact elements, and food-safe elastomers for grips and seals. The specific choice depends on the gadget’s use conditions, expected service life, and regulatory considerations for food contact.
How do I test a kitchen gadget prototype effectively?
Test under real kitchen conditions rather than only in controlled lab settings. Include functional testing under representative conditions, ergonomic testing with wet and greasy hands, durability testing at production-representative use cycles, dishwasher testing for dishwasher-safe claims, and user testing in real kitchens with actual users. Testing under real conditions reveals findings that lab evaluation misses.
When should I engage a manufacturer for my kitchen gadget?
When Phase 2 outputs are complete: validated design, complete bill of materials, tech pack, DFM-ready CAD files, and first-article inspection criteria. Approaching manufacturers before these outputs are ready produces vague quotes, unfocused conversations, and manufacturer skepticism. Waiting until Phase 2 is complete produces better quotes, easier supplier qualification, and stronger manufacturing partnerships.
Who helps inventors develop kitchen gadgets end-to-end?
A full-service product development firm that handles industrial design, mechanical engineering, material selection for kitchen conditions, prototype fabrication, functional and user testing, DFM review, and manufacturing coordination under one engagement. Firms integrating these disciplines cover kitchen gadgets, which fit primarily within a dedicated consumer products vertical.