How to Manufacture a Prototype Product: Production Options & Process Explained
Key Takeaways
Turning your product idea into a tangible prototype is critical for securing investors and validating your concept before mass production.
Each prototype manufacturing method has distinct advantages—3D printing offers speed and flexibility, while CNC machining provides precision for functional testing.
The prototype development process typically follows seven key stages, from CAD design through multiple iterations to a production-ready prototype.
Material selection dramatically impacts your prototype's performance, cost, and ability to represent the final product's functionality.
Rabbit Product Design provides end-to-end prototyping services, with senior engineers guiding clients from concept through production-ready prototypes and full manufacturing setup.
7 Critical Steps to Manufacture Your First Product Prototype
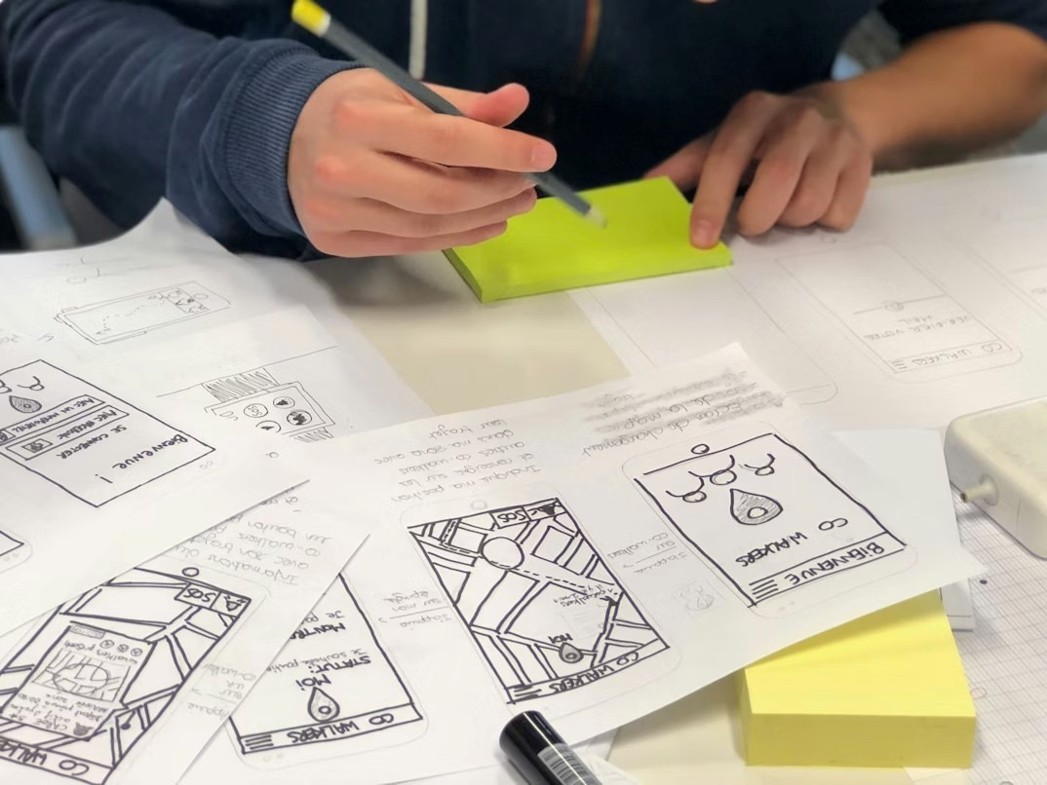
Creating a successful prototype involves more than just building a model. It requires a systematic approach that ensures your concept is thoroughly tested and refined before committing significant resources to production.
The prototype journey typically follows these seven essential steps:
Create Detailed CAD Designs: Transform your concept into precise digital models.
Select Production Method and Materials: Choose the right fabrication technique and materials.
Build Your First Prototype: Create an initial physical model.
Test, Analyze, and Document Results: Evaluate performance and identify issues.
Revise and Refine Your Design: Make improvements based on testing.
Produce Pre-Production Prototype: Create a model that closely mimics the final production.
Prepare for Full Production: Develop manufacturing documentation and processes.
Each of these steps plays a vital role in ensuring your prototype effectively validates your concept while providing crucial insights for refinement.
The early prototyping phases focus on proving basic functionality, while later stages concentrate on optimizing for manufacturability and cost-effectiveness.
Choose the Right Prototype Manufacturing Method for Your Product
Selecting the appropriate manufacturing method is perhaps the most critical decision you'll make in the prototyping process.

Each technique offers distinct advantages and limitations that directly impact your prototype's functionality, appearance, and cost.
3D Printing: Fast But Risky for Serious Product Development
3D printing may seem ideal for rapid prototyping—fast, affordable, and capable of complex geometries. However, it creates a dangerous trap: 3D-printed prototypes build false confidence by concealing critical manufacturability issues.
A prototype that works in printed plastic often can't be produced using real manufacturing methods like injection molding or die casting. Wall thicknesses, draft angles, and material properties that work in a 3D print become deal-breakers when you approach a factory.
At Rabbit Product Design, we build prototypes using production materials from the start. This reveals real-world constraints early—when changes are still inexpensive—rather than after you've invested heavily in a design that can't be manufactured at scale. If your goal is to actually manufacture and sell your product, production-first prototyping is the only reliable path forward.
CNC Machining: Precision & Strength for Functional Testing
When your prototype needs to withstand mechanical stress or requires tight tolerances, CNC (Computer Numerical Control) machining often provides the best solution.
This subtractive manufacturing process removes material from solid blocks to create precise components with excellent structural integrity.
Unlike 3D printing, CNC machining can work with production-grade materials, including metals, plastics, and composites, making it ideal for functional prototypes that perform like the final product.
Injection Molding: Perfect for Production-Ready Prototypes
For products that will ultimately be mass-produced using injection molding, creating prototype molds provides the most accurate representation of your final product.
This process involves injecting molten material (typically plastic) into custom-made molds under high pressure. While the initial tooling costs are higher than those of other methods, injection-molded prototypes closely simulate production parts in both appearance and function.
Sheet Metal Fabrication: Ideal for Structural Components
For products that require strong, lightweight enclosures or structural elements, sheet metal fabrication is an excellent prototyping solution.
This process involves cutting, bending, and assembling metal sheets into the desired form using techniques like laser cutting, punching, and brake forming. Sheet metal prototypes are particularly valuable for electronics enclosures, machine frames, and products that require heat dissipation.
Vacuum Casting: Great for Small-Batch Production
Vacuum casting bridges the gap between one-off prototypes and small production runs. This process begins with a master pattern (often 3D printed) from which silicone molds are created.
These molds can produce multiple identical parts with excellent surface quality and material properties similar to those of injection-molded components. For products requiring 10–100 units for testing or market validation, vacuum casting offers an ideal balance of quality and cost-effectiveness.
The Step-by-Step Prototype Manufacturing Process

Creating a successful prototype involves a methodical approach that minimizes costly mistakes and maximizes learning opportunities.
1. Create Detailed CAD Designs
Every successful prototype begins with a precise digital model. Computer-Aided Design (CAD) software enables you to visualize your product in 3D, ensuring all components fit together properly and function as intended.
These digital models serve as the blueprint for manufacturing, so attention to detail is crucial at this stage. Modern CAD tools allow you to simulate various aspects of your design before physical production. You can conduct virtual stress testing, airflow analysis, or motion studies to identify potential problems early.
Many entrepreneurs underestimate the importance of comprehensive CAD work, but investing time in it can prevent costly modifications later in the development cycle.
2. Select Production Method & Materials
Based on your CAD design, budget, and performance requirements, you'll need to select the appropriate manufacturing method and materials. This decision should consider not just your immediate prototyping needs but also how these choices align with your eventual production plans.
A prototype using similar materials and manufacturing methods to your final product will yield more valuable validation data. For many products, a hybrid approach works best - using different manufacturing methods for different components.
For example, you might use 3D printing for complex geometric parts while machining critical structural components that require higher strength. This strategic combination can optimize both cost and performance.
3. Build Your First Prototype
With designs and manufacturing methods selected, it's time to build your first physical prototype. This initial version focuses on validating the basic concept and identifying major design flaws.
Don't expect perfection at this stage—the goal is to create a tangible representation of your idea that allows for hands-on evaluation. During this phase, maintain close communication with your manufacturing partner.
Their expertise can often identify potential issues before production begins, saving valuable time and resources. Be prepared to make quick decisions as questions arise during the build process.
4. Test, Analyze, & Document Results
Once your prototype is complete, rigorous testing begins. Develop a structured testing protocol that evaluates every aspect of your product's functionality against your requirements.
Document all observations meticulously; both successes and failures provide valuable insights for refinement. Beyond technical performance, gather feedback on usability, aesthetics, and overall user experience.
Consider involving potential customers in this evaluation process to gain perspectives you might otherwise miss. The most valuable prototypes are those that generate actionable data for improvement.
5. Revise & Refine Your Design
Using the test results and feedback, revise your design to address the identified issues. This iterative process often requires multiple rounds of modifications and testing before achieving optimal performance.
Each iteration should bring you closer to a market-ready product, with improvements becoming increasingly refined as development progresses. During refinement, balance perfectionism against practical constraints.
While it's tempting to continue tweaking indefinitely, establish clear criteria for when your design is "good enough" to move forward. Remember that some minor improvements might be better addressed during production setup rather than extending the prototyping phase.
6. Produce Pre-Production Prototype
Once your design is substantially refined, create a pre-production prototype that closely mimics your final product. This version should use production-intent materials, manufacturing processes, and finishes.
The pre-production prototype serves as a final validation of both the design and the manufacturing approach before committing to tooling and production setup.
This prototype allows you to conduct more extensive testing, including regulatory compliance evaluations, if applicable to your industry. It also provides sales samples for potential distributors, investors, or crowdfunding campaigns. The closer this prototype is to your production vision, the more confidence you can have in your go-to-market strategy.
7. Prepare for Full Production
The final step bridges prototyping and manufacturing. Using insights gained from your pre-production prototype, develop comprehensive manufacturing documentation, including detailed engineering drawings, assembly instructions, quality control specifications, and packaging requirements.
This documentation ensures consistent production results and smooth knowledge transfer to manufacturing partners.
Work with your production team to establish efficient workflows, identify potential bottlenecks, and optimize for scale. Consider creating a small pilot production run to validate your manufacturing process before committing to larger volumes.
Materials Matter: Selecting the Best Options for Your Prototype

The materials you choose for your prototype significantly impact both performance and how accurately it represents your final product.
Plastics vs. Metals: When to Use Each
Plastic prototypes offer advantages in weight, cost, and manufacturing flexibility, making them ideal for many applications. Materials such as ABS, polycarbonate, and nylon can be 3D printed, machined, or molded to create prototypes with varying mechanical properties.
For consumer products, electronic devices, or medical components, engineering plastics often provide the perfect balance of durability and manufacturability.
Metal prototypes become essential when your product requires superior strength, heat resistance, or electrical conductivity. Aluminum offers an excellent combination of machinability, weight, and cost for functional prototypes, while stainless steel provides enhanced durability and corrosion resistance.
For specialized applications, materials such as brass, copper, or titanium may be required to validate specific performance characteristics.
Material Properties That Impact Prototype Performance
Understanding material properties is crucial for predicting how your prototype will perform under real-world conditions. Tensile strength determines how much pulling force your product can withstand before breaking, while impact resistance measures its ability to absorb shock without damage.
Thermal properties become important when your product operates at extreme temperatures or generates heat during use. Flexibility, hardness, and chemical resistance are other critical factors that vary widely between materials.
For moving parts, you'll need to consider friction coefficients and wear resistance to ensure proper function throughout your product's lifecycle. Even aesthetic properties such as surface finish, color consistency, and UV stability can be crucial for consumer products, where appearance affects purchasing decisions.
Cost Considerations in Material Selection
Material costs can vary dramatically and significantly impact your prototyping budget. While it's tempting to use the most expensive, high-performance materials from the start, this isn't always necessary or cost-effective.
Consider a strategic approach where early prototypes use more affordable materials for concept validation, reserving premium materials for later-stage functional testing.
Remember, material selection affects not just the raw material cost but also manufacturing complexity and time. Some materials require special handling, longer machining times, or additional post-processing steps that increase overall expenses.
By balancing material properties against budget constraints, you can create effective prototypes without unnecessary expenditure.
Manufacture Your Prototype Product With Rabbit Product Design's Expert Team
At Rabbit Product Design, we specialize in guiding clients through every stage of prototype manufacturing with precision and expertise. Our senior engineers, with an average of 27 years of experience, understand that prototyping isn't just about building a model—it's about creating a strategic path toward manufacturability and commercialization.
We offer comprehensive prototyping services, including CNC machining, soft tooling, looks-like-and-works-like builds, pilot runs, and user testing, all supported by continuous design-for-manufacturing feedback.
Our structured process ensures your prototype development moves efficiently from CAD design through multiple iterations to a production-ready model. We help you select appropriate materials and manufacturing methods based on your testing objectives, budget, and eventual production plans.

Whether you need a quick concept model or a pre-production prototype that closely mimics your final product, Rabbit Product Design delivers results that matter.
Unlike firms that stop at prototyping, we take products all the way through manufacturing setup, branding, and launch planning. We believe the only reliable path to product success is to build, manufacture, and sell it as a real business. Our integrated approach means you work with one experienced team from initial feasibility through market launch, avoiding costly handoffs and delays.
Ready to manufacture a prototype that sets your product up for success in production? Contact Rabbit Product Design for a free consultation and let our senior team turn your concept into reality.
Start Your Product Journey Today→
Frequently Asked Questions (FAQs)
How long does it typically take to manufacture a prototype?
Timelines vary based on complexity and manufacturing method. Simple prototypes can be completed in 1–2 weeks, while complex functional prototypes may take 4–8 weeks. The full prototyping cycle, including multiple iterations and refinements, typically spans 3–6 months for moderately complex products.
Which prototype manufacturing method should I choose?
Your choice depends on testing objectives and production plans. Use CNC machining for functional testing requiring precision and strength, injection molding for production-ready validation, and vacuum casting for small batches of 10–100 units. Avoid 3D printing for serious product development—it can hide manufacturability issues that surface later in real production.
How do I select the right materials for my prototype?
Match materials to your testing objectives. Use affordable plastics for early form and fit evaluation, then transition to production-grade materials, such as engineering plastics or metals, for functional stress testing. Consider properties like tensile strength, impact resistance, thermal performance, and surface finish based on your product's real-world requirements.
Should I create multiple prototypes or perfect one version?
Create multiple prototypes with different focuses rather than perfecting a single version. Early prototypes validate basic concepts, while later versions refine details and manufacturing processes. This iterative approach identifies fundamental issues before investing in expensive production-intent prototypes.
How can Rabbit Product Design help with my prototype manufacturing?
Rabbit Product Design offers comprehensive prototyping services, including CNC machining, soft tooling, and pilot runs. Our senior engineers average 27 years of experience and guide clients through the entire process—from feasibility and CAD development through production-ready prototypes, manufacturing setup, and market launch.
*Disclaimer: This content is for educational purposes only and not financial, legal, or business advice. Figures vary by circumstance. Consult qualified professionals before making decisions. For personalized guidance, contact Rabbit Product Design.